Showing posts with label pies. Show all posts

Friday, July 30, 2010

Pie Crust- A Beginner's Tutorial

I've given you guys a couple of pie recipes now, but haven't talked about crusts at all. And they're so important. I mean really, even the best pie filling in the world can't save a crappy crust. So let's get to it.

Pies aren't meant to be quick and easy. They're a process. But the rewards are so wonderful. And when you give someone a homemade pie, they know you really really love them. It's like a love letter you can eat. Does it get any better?
You'll find as the recipe goes along that pie pastry is all about COLD. Cold butter, cold water, and chilling your dough before baking. This things are REALLY important to making delicious pie crusts, so don't skip them!

Pie crusts were the last hold out on my vegan baking transition. Sure, it's easy to veganize a pie crust in theory, just substitute the butter with Earth Balance. But because my pie crust typically got SO MUCH of its flavor from the butter, a vegan version just never tasted right to me. Vegan crusts tend to be softer, and lack that certain something that makes people's eyes roll back in their heads. I'm still working on the perfect vegan pie crust, but for now, this recipe works really well. Like I mentioned, it makes a big difference keeping everything cold, and chilling the crust in the freezer for about an hour before baking it. And if you're not vegan and plan to use butter, then plan for people to start harassing you to make a pie every day. 
We'll start simple with a one-crust pie recipe. Besides the ingredients below, you'll need a 9" pie pan and a rolling pin. A pastry blender and pie weights are helpful, but not necessary.

Basic Pastry Dough
recipe for one 9 inch pie shell

1 1/4 cup of Flour
1 tbsp sugar
1 tsp salt
1/2 cup cold butter, cut into cubes (use Earth Balance Butter to make it vegan)
3 tbsp ice cold water.

Make the Dough:
Cut the butter into cubes, place in a bowl, and put back in fridge or freezer to chill. Measure out the flour, sugar and salt, and stir together to combine. Add chilled butter, and using pastry blender or two knives held together, cut butter into flour quickly, until pea-sized lumps appear. Add cold water one tbsp at a time, mixing together with a fork until it just comes together (you may not need all 3 tbsp). Gather dough into ball and smooth together.
Roll the Dough:
Many pie crust recipes call for chilling the dough after mixing. This recipe is best if rolled right away, and chilled later. If not using right away, form into a small circle, or rectangle, wrap in plastic wrap, place in a freezer bag, and freeze for up to 2 months. If using now, flour your surface and rolling pin well. Form dough into a round, and pat down to flatten into a disk about 4 inches in diameter. Place on floured surface, and sprinkle some flour on top. Start in the center and roll out to the edges, stopping just before the edge. Lift dough and turn 1/4. Continue rolling and turning until the dough is about 12 inches in diameter. If your kitchen is very hot, you may need to stick the dough in the fridge to chill during the rolling process.
Rolling dough is one of the hardest parts of the process and takes the most practice to find the right amount of pressure to roll it out evenly. Take your time, and don't be discouraged if it doesn't look perfect! If the dough happens to rip or tear at any point, wet your finger, and piece it back together using the water as "glue". 

Transfer the Dough:
I like to fold my dough loosely into quarters and then place into a 9" pie pan. Some people like to roll the dough around the rolling pin, but I've never had luck with that method. Unfold pie dough into pan and allow the dough to fall down to the bottom of the pan. Do not stretch the dough, but rather lift up the dough one side at a time, and press it gently into the bottom and sides until it is smooth and even. Trim off excess dough, leaving about 1-2 inch overhang.

Crimp the Dough:
If this has already been too much work for you, you can simply tuck the excess dough under the top rim, and run a fork around the edge to crimp together. If you'd like to get extra OOOHs and AHHHs, now would be the time to crimp the edge. Fold excess dough under itself along the top of the dish. There are several methods of crimping. Smitten Kitchen uses this V version. Mine is similar, though I place both hands perpendicular to the rim, and with both hands' pointer finger and thumbs making a V shape, place them on the dough and push them together and up slightly to create a sharp ridge, and continue this process all the way around. Crimping takes some practice to get used to, and once you find a method that works for you, just stick with it!
Chill the Dough:
Now you need to chill the dough for at least a half an hour. Chilling at this point keeps the dough from shrinking, and helps to maintain all that crimping work you just did. If you're using regular butter, 1/2 hour to 1 hour in the fridge will be fine. If you're using vegan Earth Balance, I think it works best if you wrap it lightly and stick in in the freezer for about an hour. While the dough is chilling, you can start prepping your pie filling.
Partially and Pre-Baked Crusts:
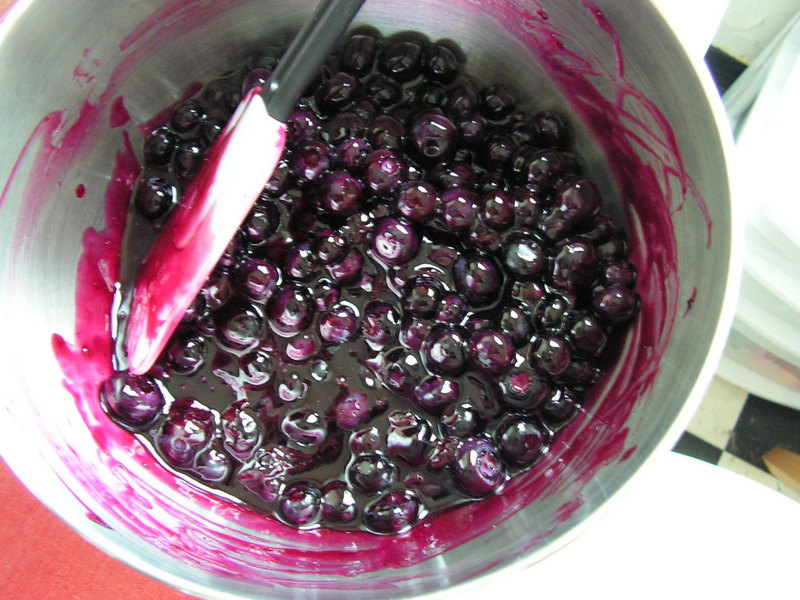
Once your pie crust is done chilling, depending on the recipe you're using, you can then fill with ingredients and bake away. Some recipes call for Partially baked or Blind Baked crusts. When partially baking a crust, you're baking it part of the way, then adding filling and baking the rest together. This is usually done for fillings that are extra wet so that the crust bakes properly and doesn't become a soggy mess. For no-bake fillings (like this blueberry pie), you need to completely bake the crust before you add the filling, which is called "blind baking." For both of these methods, you need to weigh down the crust so that it doesn't bubble up while baking. There are several methods to use, and all require lining the pie crust with either aluminum foil or parchment paper. You can then add uncooked rice, dried beans, or pie weights. Pie weights are one of those things that aren't exactly necessary, but they sure do impress people when they see them on your shelf.
Once your crust is lined and weighed down, place pan in a oven pre-heated to 350 degrees, and bake for about 20 minutes. If you're partially baking the crust, you can remove the dish at this time, remove the foil or paper and weights, then follow the recipe for further baking. If you're blind baking, you're still going to remove the weights, and then bake for another 10 minutes, or until the crust looks browned and smells delicious. You'll want to cool the crust completely before adding any no-bake filling.
Well, you did it! I knew you could! If the first one (or ten) happen to be a flop, remember that tomorrow is another day. Patience and persistence are the keys to becoming a master pie maker. Just keep practicing, and you can be pumping out homemade crusts in ten minutes or less, just like your Grandma, or your Aunt Betty, or whoever it is in your family that wins all those blue ribbons for pies.
And trust me, the payoff is TOTALLY worth it. And until then, imperfect pie crusts are cute, and let people know for sure that they're homemade and filled with love!

Have you been bitten by the pie bug? Here's some other resources to check out:
A friend gave me Williams-Sonoma's Pie and Tart cookbook as a birthday gift two years ago, and I learned a lot of what I know from that book. Their pastry dough recipe is still my go-to for any pie and I've had rarely any problems with it that weren't heat or weather related. If you're new to pies or a seasoned pro, I recommend this book to either get you started in the wonderful world of pastry or to improve your game. 

Pie by Ken Haedrich is also a very thorough tomb that will get you excited about about everything pies! It's big, it's hefty, and it's got 300 recipes for every pie imaginable (and those you've never thought of before). 

And here's some other blogs who've written extensively and much more coherently about crust making than this post: Smitten Kitchen (she's got lessons 101, 102, and 103), Joy the Baker, and Joe Pastry

Tuesday, July 13, 2010

Chocolate Peanut Butter Pretzel Pie

No need to check again, you read that right the first time. Chocolate. Peanut Butter. Pretzel. PIE. It's creamy. It's smooth. It's crunchy. It's decadent and rich. It's VEGAN. Believe it, folks.

Whoa Nelly! This is the kind of pie that sneaks up on you. You start with one teeny tiny slice. Which quickly turns into two slices. And before you know it, you've got your fork in the dish picking at the sides. Soon after, you throw all caution to the wind, and you end up with your finger in the pie. These things happen.
If you're lucky, you've got a good friend there to share in the indulgence, and to help rein each other in when faces start getting dangerously close to the pie.
Seriously, this thing should come with a warning: DO NOT EAT ALONE. But, y'know, if you do happen to go it alone and get half-way through the pie before you know what happened, I won't judge you. Pinky swear.
Of course there's some things I'd try differently next time: lightening up the peanut butter filling, making a harder ganache, tweaking the crust. But the recipe got eaten up pretty quickly as is, so no complaints here.

Chocolate Peanut Butter Pretzel Pie
adapted from Vegan Nom Noms

Crust-
1 cup of finely ground pretzels
5 tbsp of Earth Balance vegan butter
3 tbsp of sugar

Pre-heat oven to 350 degrees. In a small saucepan, melt butter slowly over medium heat. Mix together pretzel crumbs and sugar in a small bowl. Once butter is melted, add to pretzel crumbs and mix until completely moistened. Press crumbs into 9 inch pie pan and up the sides. Bake for 10 minutes, or until crust is set. Allow to cool completely.

Peanut Butter filling-
1 12 oz container of Extra-firm silken tofu (I like Mori-Nu brand in the aseptic packs. You can find them in the asian aisle, or at the asian market.)
1 cup smooth peanut butter
1/3 cup powdered sugar
1/4 - 1/3 cup maple syrup (you can also use agave or brown rice syrup in its place)
1 tsp vanilla extract

Drain tofu and remove excess water. Combine all ingredients in a food processor and blend until smooth. (Since I used natural peanut butter, I used 1/3 cup of syrup. If you're using PB that's already sweetened, use less syrup to keep it from getting too sweet. ) Pour filling into prepared crust, and keep in fridge while you make the ganache.

Chocolate Ganache-
1/4 cup almond milk (or your non-dairy milk of choice)
3/4 cup of vegan chocolate chips
2 tbsp maple syrup (or agave, etc)

In a small sauce pan, heat milk on medium heat until it comes to gentle boil. As soon as it boils, remove from heat and add chocolate and syrup and mix until well-combined and smooth. Allow to sit for 10-15 minutes while it begins to solidify. You may drizzle the ganache on top of the peanut butter filling or cover it completely like I did. I also crushed up some pretzels with my hand and sprinkled it over the top of the ganache while it was still wet. Allow the ganache to set for at least one hour before serving.
Makes 1-12 servings depending on who's watching and if you're sharing.

Saturday, July 3, 2010

Pies in July!

"I'm gonna make a pie today!" That's what I said when I woke up Thursday morning. I said this out loud. The only one around to hear was my kitty Gracie, and she seemed unimpressed. I didn't let it deter me though. 
Why pie? My decision had more to do with the cool breeze running through the apartment than anything else, but the fruit stands over-flowing with summer's bounty might have planted the seed as well. An unseasonally cool day in July when berries abound is a gift that must not be squandered. And so pie was made. 
Pies must be in the collective unconscious this week. Deb at Smitten Kitchen's been making lots of pies lately, and Joy the Baker just whipped up a berry pie the other day. And we all know I'm on team pie.
Pies are truly wonderful. Anyone can throw together a cupcake, but if someone bakes you a pie, that's real love. 
With all this in mind, I've decided July will be pie month. If the heat wave comes back I can't promise anyone I'll actually be making pies, but I will (finally!) be giving that pie crust tutorial I've been talking about, and discussing tools, and giving some recipes. I hope you're all as excited about pies as I am!
Pies are pretty great for impressing boys, even if they don't have a sweet tooth. Trust me on this one. It also works really well on friends, bosses, and parents. Come to think of it, a homemade pie impresses just about any one. This is why you must do it. 
This pie in particular is what made my boyfriend fall in love with me. I can't guarantee you'll have the same success. On a related note, be careful who you share it with. 
I meant to tell you about this pie yesterday so that you'd have time to make it for your weekend barbecues. But I got distracted by all those muffins I have to bake. If you don't have enough time to make it before your Independence Day party, don't let it stop you from making it later this week. This pie is just as good for parties as it is for Wednesday morning breakfast. But please, make it while the berries are still plentiful, plump and DELICIOUS. 
I promise promise, PINKY SWEAR that I've got a pie crust tutorial in the works. Until then, for this recipe, I'm going to assume that you've got either A) got a crust recipe that you swear by or B) buy your crusts pre-made. Either way, I'm not judging you. Whatever you do, you'll need to completely pre-bake your crust before you make the filling. 

The Best Blueberry Pie You'll Ever Try
(I've been making this so long and adapted it so much, I don't know where it came from originally)

4 cups fresh blueberries, rinsed and dried
1/2 cup of water
1/2 cup sugar
2 tbsp of cornstarch + 2 tbsp of water
1 tsp lemon juice
pinch of salt
1 9inch pie crust, pre-baked

Pre-bake your pie crust, and allow to cool before you start making the filling. 
Rinse blueberries and lay them out to dry. Place one cup of berries in a medium sauce pan with 1/2 cup of water. Cover, and bring to a boil. Once boiling, reduce heat and let simmer for about 3 minutes, or until berries burst. 
Meanwhile, whisk together cornstarch and water, set aside. Once berries have burst, add cornstarch mixture, lemon juice, sugar and salt, and stir. Continue to cook for several minutes until syrup becomes thick and translucent. Remove from heat, add remaining berries, and stir gently to coat with syrup. 
Pour mixture into pre-baked pie crust. Allow to firm up for at least 2 hours at room temperature before moving to fridge. I've never seen this pie last longer than 2 days, and cannot account for freshness after that point. 

*Note*- The reason this pie knocks people out and makes boys fall in love with you is because you don't smother the berries in sugar and bake them to death. Instead, it's mostly whole, plump berries slightly sweetened and held together with homemade jam. Because of this, the pie will only be as good as your blueberries, and frozen berries are not recommended unless you froze them yourself. 

Saturday, April 17, 2010

Pear and Ginger Pie

So the Great American Bake Sale- Philly Food Blogger Edition- was today, and it went great! I took tons of pics and met lots of sweet ladies and gents with even sweeter snacks. And then I LEFT MY CAMERA THERE. Epic Fail. Since I haven't gotten it back yet, you'll just have to wait to see/hear about it. But in the meantime, I've got some other things to talk about.
I need to tell you about my dear friend Theresa. She's awesome. She's smart, and beautiful, and sweet and kind. She's tons of fun to hang out with and extremely supportive of her friends, and just generally a top-notch gal. To know Tree is to love her. And another reason why I love Theresa? She loves my pies. In particular, my pear and ginger pie. So for her birthday (which was back around Easter), I made her a little pie to call her own. 
I happened to have some mini-pie crusts in my freezer left over from a pie-a-palooza a few months ago. I had made a bunch of crusts, lined some small disposable tins, wrapped them in plastic wrap and threw them in the freezer. I don't normally plan ahead like this, but I was quite pleased with myself for the foresight. And I'm not usually one to take shortcuts while baking, especially with my pies, but since I was baking and decorating 4 dozen cupcakes that same morning, I thought i'd give myself a break. 
Theresa's not the only one that loves this pie. This pie can convert cake eaters and make boys fall in love with you. There's lots to love about it, but it's quite simple. It's not too sweet. I like to let the pears sing quietly in their subtle sweetness. But just when you thought everything was safe and mild, the ginger lights a match in the back of your throat and kicks you from behind. And somehow, it all works together and marries beautifully and delicately on your tongue and in your belly. And you'll start to find excuses to eat it for breakfast. 
Now I know that many people talk about baking being a science. And it is. I'd be lying if I said I never measure anything because somethings require precision and ratios. Like pie crust. I've fine-tuned my crust-making techniques over the last year and now have a flawless recipe. But when it comes to fruit fillings, I like to play fast and loose.  I don't think I've ever actually followed a fruit pie recipe. I tend to think of them as "suggestions", and just kind of toss the ingredients together until it looks right. But I realize some people need rules, boundaries, maps. So, I'm going to give you the recipe that I didn't follow, which is for a full 9 inch pie. I used every item listed in the recipe, but may have added some as I saw fit. As for amounts and ratios, all bets are off. 

Pear and Ginger Pie
adapted from The Garden of Vegan
One 9 inch vegan pie crust (i'll post a recipe eventually)
4 pears, not too ripe, cored and sliced
1/2 cup dry sweetener
3 tbsp fresh ginger, grated
1 tbsp arrowroot powder
2 tbsp fresh lemon juice
1 tsp vanilla
1 tsp grated lemon zest
1 tbsp cinammon sugar

Preheat oven to 375 degrees. In a large bowl, I like to pour the sugar over the fruit first, and mix it up, then combine the other ingredients together (except for the cinammon and sugar) in a small bowl, and pour over the pears, tossing to cover. Pour into prepared pie shell, and sprinkle cinammon and sugar on top. Bake for 40-45 minutes or until liquid is bubbling and filling is set. Allow to cool completely on wire rack. Unless you're Theresa, and you can't wait for it to cool or set and need warm soupy pie immediately. Either way, it's delicious.